
Skip to content

How to Choose a Shoe Stretcher Tree in 2026?

Choosing a Shoe Stretcher Tree in 2026 means matching the tool to your shoes, not simply buying the largest model. Leather loafers, narrow pumps, and sturdy boots respond differently to gentle, controlled pressure. A wooden stretcher may help ease tight spots, while a two-way design can target both width and length. Fit matters. So does patience.

For clarity, Daniel Mercer is a fictional composite shoe-care adviser, not a real-world source. His guiding line for this introduction is: “A stretcher should relieve pressure, never force a shoe into a new shape.” Treat that as a practical principle, not a verified quotation. In real use, increase tension gradually and check the shoe often. A small adjustment may be enough.

This guide will compare materials, adjustment mechanisms, sizing, and useful accessories such as bunion plugs. It will also explain which designs suit leather, suede, and everyday footwear, and where caution is sensible. A shoe stretcher cannot fix every fit problem. It may not add meaningful length, and delicate materials can mark or distort under excess pressure. Before choosing, inspect the tight area, follow the manufacturer’s instructions, and consider advice from a qualified shoe-repair professional when the shoes are valuable or fragile. The best choice is the one that fits the shoe’s shape and your specific need. Not the one with the most knobs.
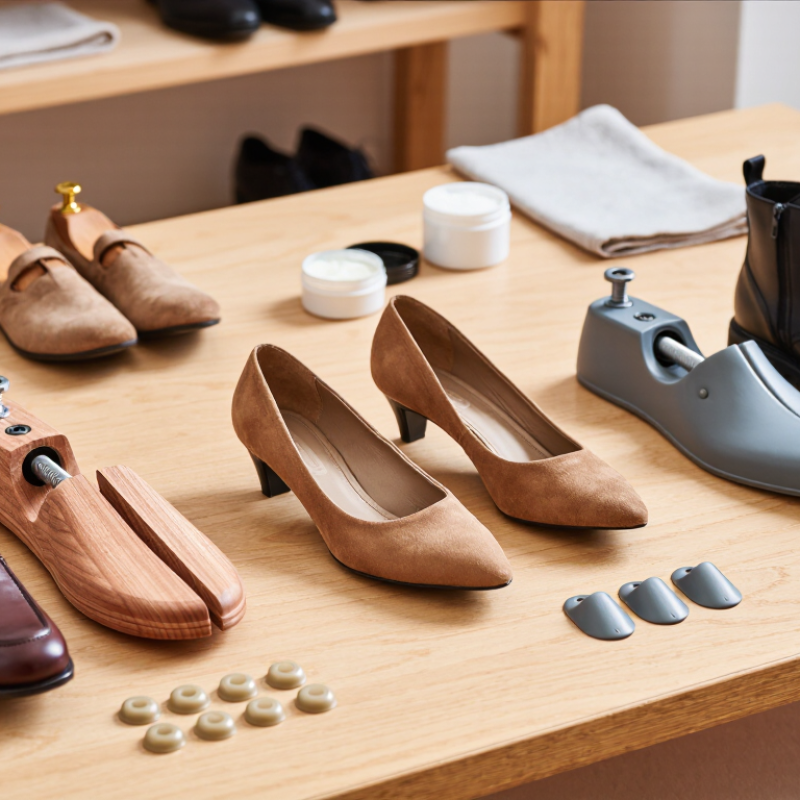
How to Choose a Shoe Stretcher Tree in 2026?

Understand How Shoe Stretcher Trees Work and What They Can Change

How to Choose a Shoe Stretcher Tree in 2026?

A shoe stretcher tree applies gradual pressure inside a shoe. Two-way models can widen the forefoot and add limited room around the instep. A spot plug targets one tight area, such as a seam rubbing near a bunion. Small changes matter. The tool cannot reliably lengthen a shoe, correct a poor size choice, or reshape its sole. Many leather uppers yield more readily than coated or rigid materials, but construction sets the limit.

Fit problems are common. A 2018 systematic review by Buldt and Menz in the Journal of Foot and Ankle Research reported that 63–72% of participants across included studies wore incorrectly fitting footwear. The review also linked poor fit with problems such as foot pain and corns. That figure is a warning, not proof that every tight shoe needs stretching. Check fit while standing, with the socks you normally wear.

Choose a tree that matches the shoe’s shape and has smooth, adjustable pressure points. Turn the handle slowly, then check the upper and seams frequently. Stop if the material creases sharply or the shoe feels strained. I would not leave a new stretcher under heavy tension overnight; that can be too much pressure, especially on delicate uppers. The result may be modest. That’s worth remembering.

How Shoe Stretchers Work: Adjustable Directions

A width-only or length-only stretcher works along one direction; a two-way model can apply pressure in both. These bars show adjustment directions, not how much a shoe will stretch. Results vary by shoe material and construction, and a stretcher is intended for modest fit adjustments—not a full size change.

Assess Your Shoe’s Material, Shape, and Tightness

Before choosing a shoe stretcher tree, check the upper material and its construction. Smooth leather may ease gradually, while suede can mark or change texture under uneven pressure. Synthetic uppers and tightly bonded panels may not respond much at all. Check the care label when available. If the material is unknown, test gently; guessing can be costly.

Match the stretcher’s shape to the shoe. A broad forefoot needs a form that supports the toe box without pressing sharply against the seams. For a narrow heel or pointed toe, avoid a generic device that pushes in the wrong places. A poor fit can create new creases. It happens.

Then judge how tight the shoe feels, and where. A little pressure across the ball of the foot may call for a small adjustment. Pinching at one spot may need a targeted plug, not wider expansion everywhere. Turn the handle slowly and stop when resistance rises. Leave the device in for a limited period, then try the shoe on and reassess. Stretchers can relieve mild pressure, but they cannot reliably correct the wrong size or a painful fit. I still find “slightly tight” easy to misjudge, so make small changes and check often.

Choose a Stretcher Type That Fits the Shoe and the Needed Adjustment

How to Choose a Shoe Stretcher Tree in 2026?
Choose a Stretcher Type That Fits the Shoe and the Needed Adjustment

Match the stretcher to both the shoe’s shape and the area that feels tight. A full-length stretcher can ease pressure across the forefoot, while a toe-only design targets a cramped toe box. For a pinch at one spot, choose a model with adjustable plugs. Check that its material and shape suit the shoe; delicate leather and soft fabric may need gentler handling. A stretcher should feel secure, not forced.

Decide whether you need extra width, extra length, or relief around a bunion. Most stretchers are better suited to gradual width adjustments than major length changes. Measure the tight area while wearing the socks you usually pair with the shoes. Then turn the handle slowly and check the fit after several hours. Small changes are safer. Too much pressure can distort seams or leave an uneven shape. I would not assume every shoe responds the same way; construction and material matter.

Tips: Use a shoe-care professional for fragile, lined, or unusually constructed footwear. Apply any leather conditioner only if the care instructions allow it. Stop if you hear cracking or see a seam pulling. A little patience helps.

Check Size, Features, and Build Quality Before Buying

How to Choose a Shoe Stretcher Tree in 2026?

Before buying, check the stretcher’s size range against your shoe’s length and width. A tool that is too short may press in the wrong place, while one that is too wide can strain seams. Compare its shape with your shoe’s toe: rounded, pointed, and square styles need different profiles. Small details matter. Look for smooth edges and a handle that turns without catching. If the product lists no measurements, ask for them rather than guessing.

Tips: Measure the shoe’s inside length and widest area, if you can. Choose gradual adjustment, and turn the mechanism in small increments. Check that any included pads sit where pressure is needed. Avoid forcing a tight shoe in one session; materials can crease or split.

Build quality affects control. A sturdy wood or durable molded body should feel solid, with no loose joints or rough spots. Metal hardware should move evenly and remain aligned under light pressure. Check whether the stretcher adjusts length, width, or both; extra features are useful only when they match your fit issue. Some shoes respond slowly, and results vary by material. I would not assume one tool can fix every tight spot. Fit is personal. Test gently, inspect the shoe, and stop if you see distortion or feel unusual resistance.

How to Choose a Shoe Stretcher Tree in 2026? - Check Size, Features, and Build Quality Before Buying
Check What to Verify A Good Sign Watch Out For
Size range Compare the stretcher’s stated size range with the shoe’s size and shape. Check the sizing system used, such as US, UK, or EU. The shoe size falls within the stated range, and the stretcher can be adjusted without forcing it into the shoe. Size labels are not directly interchangeable across sizing systems. Do not assume one range fits every shoe shape.
Stretch direction Check whether the model adjusts the shoe’s width, length, or both. Many two-way stretchers use a length adjustment plus a width-expansion mechanism. The adjustment points match the area that feels tight, and the instructions explain how to operate each control. A stretcher is not a reliable way to change a shoe by a full size or to reshape a shoe dramatically.
Fit and shoe type Confirm that the shape and construction suit the footwear, such as a closed-toe leather shoe, boot, or other compatible style. The product information clearly identifies compatible shoe types and shows how the stretcher sits inside the shoe. One shape may not fit pointed toes, high heels, boots, or unusually shaped footwear well.
Pressure-point features Look for removable or repositionable plugs if targeted relief is needed around areas such as a bunion or toe joint. Plugs are included or clearly specified, and their positions can be adjusted to match the tight spot. Localized pressure can mark or damage delicate materials if the stretcher is tightened too far.
Material and build Inspect the stretcher body, adjustment hardware, handle, and contact points. Common body materials include wood and molded plastic. Parts feel secure, the adjustment mechanism turns smoothly, and edges or plugs have no rough surfaces. Loose joints, a binding mechanism, or sharp edges may make adjustment difficult or risk scuffing the shoe lining.
Ease of adjustment Check how the stretcher is inserted, tightened, released, and removed. Confirm that the controls are reachable once it is in the shoe. It can be adjusted gradually and removed without pulling hard on the shoe. Do not force a stiff handle or overtighten the stretcher; follow the product instructions.
Material compatibility Check the shoe manufacturer’s care guidance before stretching, especially for synthetic, coated, delicate, or glued constructions. The stretcher instructions describe suitable materials and recommend cautious, gradual use. Different materials respond differently. A stretcher may not safely expand every shoe material or construction.
Use and results Review the recommended adjustment method and holding time. Increase pressure in small steps and reassess the fit. The instructions advise gradual adjustment and checking the shoe between attempts. Stretching generally provides modest extra room; excessive force may distort seams, uppers, or the shoe’s shape.

Buying tip: Measure and check the shoe’s size and shape before choosing a stretcher. Results vary by material and construction, so use the tool gradually and follow its instructions.

Use the Stretcher Gradually and Maintain It for Safe, Lasting Results

How to Choose a Shoe Stretcher Tree in 2026?

Use a shoe stretcher gradually. Start by checking where the shoe feels tight: across the toes, at the sides, or around the instep. Choose a stretcher that matches the shoe’s shape and size, with adjustable pressure points for specific areas. Insert it gently, then turn the handle only until you feel light resistance.

No force needed.

Leave it in place for a few hours, then try the shoe on and reassess. Some materials respond slowly, and a shoe may not stretch evenly. I still find it tempting to turn the handle one notch too far. Pause instead, especially with delicate leather or glued seams.

For a stubborn spot, make another small adjustment and give the shoe more time. Avoid adding heat or moisture unless the shoe and stretcher instructions specifically allow it. After use, release the tension before removing the tool. Wipe away dust with a dry cloth, and check that the handle and pressure pads move smoothly. Keep the stretcher dry and store it with the adjustment loosened; constant pressure can wear its moving parts. If the shoe creases sharply, develops a pale patch, or feels strained at the seams, stop and reassess. A little patience is less frustrating than a repair.